



Drifting is controlled oversteer: the rear wheels lose grip and slide wide while the front wheels keep enough traction to steer and hold a line. Building a brick-built RC car that does this on purpose — rather than just spinning out — comes down to three things working together: less grip at the rear than the front, enough steering lock to catch and hold the slide, and weight placed to help the rear let go rather than dig in.
That last point is the one most builders get backwards, so it’s worth being precise about before anything else.
Weight goes toward the front, not the back
It’s tempting to assume a heavy rear end helps the car slide — more weight, less control, right? It’s the opposite. Weight over a tyre increases that tyre’s grip, not reduces it. Load up the rear and you’re giving the rear tyres more traction to work with, which fights against exactly the slide you’re trying to create. This is well established across the RC drift hobby: a front-weighted setup, roughly 55-60% of the car’s weight over the front axle, is the standard starting point, because it keeps the front tyres planted for steering while leaving the rear light enough to break loose predictably.
In brick terms, that means positioning your battery box and any other heavy components (motors, if you have a choice in placement) toward the front and centre of the chassis rather than the rear. If your build ends up rear-heavy by default because of where the drive motor sits, that’s worth correcting before you worry about anything else on this list — it’s the single change most likely to make a car actually driveable sideways instead of just spinning.
Grip differential: grippy front, slippery rear
The core mechanism behind every drift setup, brick or otherwise, is a deliberate grip mismatch between front and rear: the front tyres need to hold on, the rear tyres need to let go.
- Front tyres: keep standard tread, or the grippiest tyres available to you. Front grip is what lets you steer through the slide rather than just watching the whole car slide off in a straight line.
- Rear tyres: reduce their grip deliberately. Smooth tyres with no tread work well. Wrapping standard tyres in smooth tape is a common, cheap way to cut rear grip further if you don’t have dedicated low-grip tyres. Hard plastic sleeves over the rear tyres go further still, for a more consistent, controllable slide.
The goal isn’t zero grip at the rear — a rear tyre with genuinely no grip just spins uselessly and won’t propel the car at all. The goal is less grip than the front, enough that the rear steps out predictably under power rather than staying planted.
Skip the differential on the rear axle
If you’re choosing between a direct-drive rear axle (both wheels fixed to one solid axle, no differential) and a differential setup, direct-drive is the better starting point for a drift build specifically. A differential exists to let the two rear wheels spin at different speeds through a corner — useful for a car that’s meant to grip and corner cleanly, but the opposite of what you want here. A solid rear axle forces both rear wheels to spin together, which makes the rear end easier to break loose as a unit rather than one wheel finding grip and pulling the car straight. This also happens to be the simpler, cheaper build — one less mechanism to get right.
Steering: more lock than you think you need
A drift car needs to out-turn a normal driving line, because you’re steering into the slide to catch it, not just steering toward where you want to go. Build in as much steering lock as your chassis geometry allows — check the full range of motion before you commit to bodywork, and make sure the tyres have clearance to reach full lock without rubbing the wheel arches. A car that can only manage a modest turning circle will spin out or straighten up rather than holding a controllable slide, no matter how good the weight balance and tyre setup are.
If you’re building on our IR-based system, the servo steering motor’s on/off-style control (full lock left, full lock right, rather than a smooth in-between) actually suits drift well — sharp, decisive steering inputs are closer to how a real drift car is caught and held than gentle, proportional corrections would be.
Motor choice: enough torque to break traction on throttle
Initiating a slide on throttle (rather than just entering a corner already sliding) means the rear wheels need enough torque to spin up and break traction the moment you apply power. An underpowered motor struggling to move the car at all won’t manage this — you generally want an L or XL motor rather than the lower-torque M motor for a drift build, sized to your chassis weight the same way you would for any RC build. If you find the rear end simply won’t break loose under power no matter how you’ve set up the tyres, torque is often the missing piece, not grip.
An alternative approach: dual-channel power control
Everything above works by managing grip — front versus rear, tyre compound, weight placement. There’s a genuinely different way to get the same result: control the left and right wheels independently, rather than driving all the wheels through a single channel.
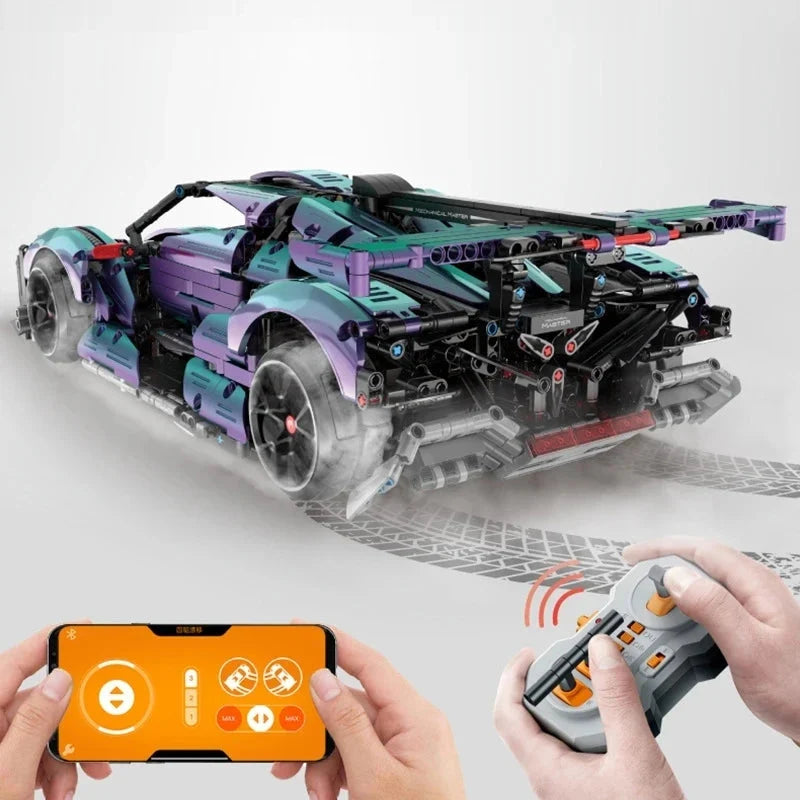
The idea is straightforward. Instead of one motor channel driving both rear wheels together, you wire the car so the left wheels run on one channel and the right wheels run on another — Channel A to both left wheels, Channel B to both right wheels, for example. This needs an RC kit or remote with at least two independently controllable power channels, which most multi-channel kits provide. Two of our own sets, the Apollo IE Superplated and Mini The British Bug, are built around exactly this setup.
With each side powered independently, easing off one side while keeping power to the other creates a rotational force that swings the car sideways — reduce power to the right side while holding power on the left, and the car slides toward the right. It’s the same underlying principle as tank-steering, or torque vectoring in a modern performance car: an intentional power imbalance between the two sides, rather than a grip imbalance between front and back.
This approach works best paired with tyres designed to roll more freely sideways as well as forward — sometimes sold as double-layered drift tyres — since they reduce the resistance fighting against the lateral slide the power imbalance is trying to create. The advantage of this method is that it puts the drift directly under remote control: you’re steering the slide by how you balance power between the two channels, rather than relying entirely on weight and tyre setup being correct before you’ve even switched the car on. It’s a genuinely different build to the front-weighted, grip-differential approach above, not a variation on it — worth trying as its own project if the grip-based method isn’t giving you the result you want.
Putting it together
The steps below cover the grip-based approach — the more common starting point, and the one that doesn’t depend on your kit having multiple power channels.
- Position the battery box and heavy components toward the front and centre of the chassis.
- Fit high-grip tyres at the front, deliberately reduced-grip tyres (smooth, taped, or sleeved) at the rear.
- Build the rear axle as a direct-drive solid axle rather than adding a differential.
- Maximise steering lock and confirm tyre clearance at full turn before adding bodywork.
- Choose an L or XL drive motor — enough torque to break rear traction on throttle.
- Test on a smooth, low-obstruction surface first. A car set up correctly for drift will feel noticeably looser and more sideways-prone than a standard build — that’s the setup working, not a fault.
For the wiring, mounting, and general build sequence this guide doesn’t repeat, see our full How to Build a LEGO RC Car guide, and How Does LEGO Remote Control Work if you want the component-level detail behind the motor and steering choices above. For the steering mechanism itself in more depth — linkage types, common causes of slop or bind, and how to get consistent lock on both wheels — see our dedicated How LEGO Steering & Driving Mechanisms Work guide.

Leave a comment
This site is protected by hCaptcha and the hCaptcha Privacy Policy and Terms of Service apply.